Git#
This section will give you a brief introduction to Git and how we will use Github.uio.no in this course.
Note!
Notice that we are using a UiO managed version of Github – Github.uio.no – and NOT Github.com.
Git is a version control system that lets you manage and keep track of you source code history. Git uses so called repositories to store a collection of files of a project, including previous versions of these files (file history). There is no need to become an expert at Git, however, that are a few commands that you will use frequently and that it is worth spending some time to familiarise yourself with:
git init: initialize an existing directory as a Git repository
git clone: retrieve an entire repository from a hosted location via URL
git add: add a file as it looks now to your next commit (stage)
git commit: commit your staged content as a new commit snapshot
git pull: fetch and merge any commits from the tracking remote branch
git push: transmit local branch commits to the remote repository branch
git status: show modified files in working directory, staged for your next commit (use this abundantly)
git log: show all commits in the current branch’s history
When working with branches, these commands are
git branch: list branches
git branch [branch-name]: create a new branch at the current commit
git checkout [existing-branch-name]: switch to another branch and check it out into your working directory
git merge [branch]: merge the specified branch’s history into the current one
Checkout the Github cheat sheet for more commands: https://education.github.com/git-cheat-sheet-education.pdf
There are many good resources on Git online and we encourage you to have a look at them. Some examples are listed below:
Informasjon on Github at UiO (Norwegian only): http://www.uio.no/tjenester/it/maskin/filer/versjonskontroll/github.html
Git Guide by Github: git-guides
Git tutorials from Atlassian: https://www.atlassian.com/git/tutorials/
Pro Git: https://git-scm.com/book/en/v2
Git Reference : http://git.github.io/git-reference/
Become a Git pro in just one blog. A thorough guide to Git architecture and command line interface: https://itnext.io/become-a-git-pro-in-just-one-blog-a-thorough-guide-to-git-architecture-and-command-line-interface-93fbe9bdb395 (Tip: open page in your browser’s private mode if you have exceeded the medium.com’s free readings.)
It can also be worth watching the introduction lecture (about 53 min) on Git from one of the popular CS50 courses at Harvard:
Install Git#
Git often comes installed by default on most Mac and Linux machines.
On Windows you can use Git for Windows: https://git-for-windows.github.io. We have installed Git for Windows on the Windows computers in the student lab (V329).
Git for Windows provides a BASH emulation Git BASH used to run Git from the command line.
It also provides a graphical user interface Git GUI. However, we recommend using the command line interface to get familiar with the basic Git commands.
There should be a link to Git BASH on the desktop. Double-click on Git BASH, navigate to an appropriate directory and clone your Github.uio.no repository. The default path when starting Git BASH is typically your UiO home directory.
A guide on how to install Git is provided by Github here: git-guides/install-git
Setup of Github repository#
Before you start to work on the exercises and project, you will have to create a git repository on Github.uio.no. A Github Organization site called FYS4220-2024 has already been created for FYS4220. If this organization is not visible after you have logged in to Github.uio.no, contact the course instructor. You can only be added to the organization after you have logged in for the first time and your user has been created.
The direct link to the organization is https://github.uio.no/FYS4220-2024.
Login in to Github.uio.no and create a new repository in the FYS4220-2024 organization (click the green button called New). Name the repository as shown in Fig. 10 replacing lastname and firstname with your respective lastname and firstname.
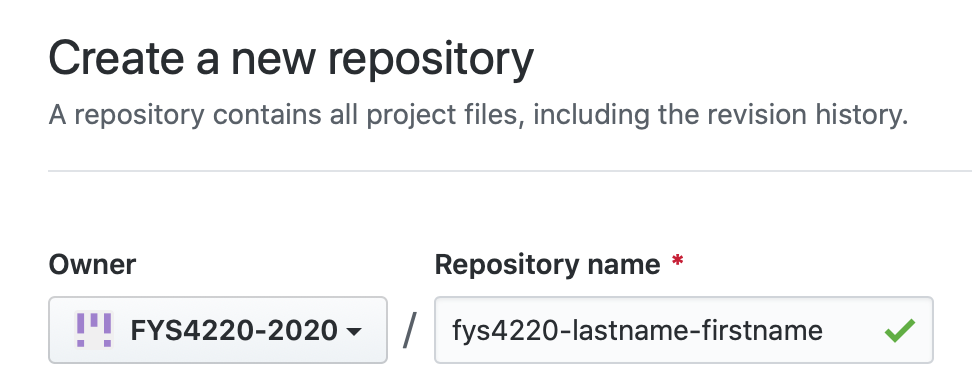
Fig. 10 Name your Git repository accordingly. The example image is from 2020. An organization with the current year has been create. Please use this.#
Note!
Please stick to the naming convention for the repository name as specified above. This makes the instructors’ life easier!
Choose your preferred visibility [Public | Internal | Private]. If you choose Public or Internal your repository will be visible for everyone who is logged in to Github.uio.no. If you choose Private only you and the course instructor can see your repository.
A note on sharing and collaboration
In general we encourage collaboration and therefore suggest that you set the visibility to the default value, which is Internal (not sure if there is practical difference between Public and Internal for our usage). However, keep in mind that to learn any programming language there is no way around doing the hard work yourself (practice, practice, practice). If you try to take the “easy way” out by copying and pasting from your fellow students repository, you only fool yourself. Instead, if you get stuck, discuss the problem with other students and use instead their repositories as inspiration rather than just a simple copy and paste. Also, for this purpose it is recommend that you do your best to document your code – write structured and easily readable code with relevant comments explaining the purpose of your code.
Enable the “Initialize this repository with a README” and leave .gitignore initialization as None as shown in Fig. 11. Github does not provide a template .gitignore-file for VHDL. We will therefore add this file manually later.
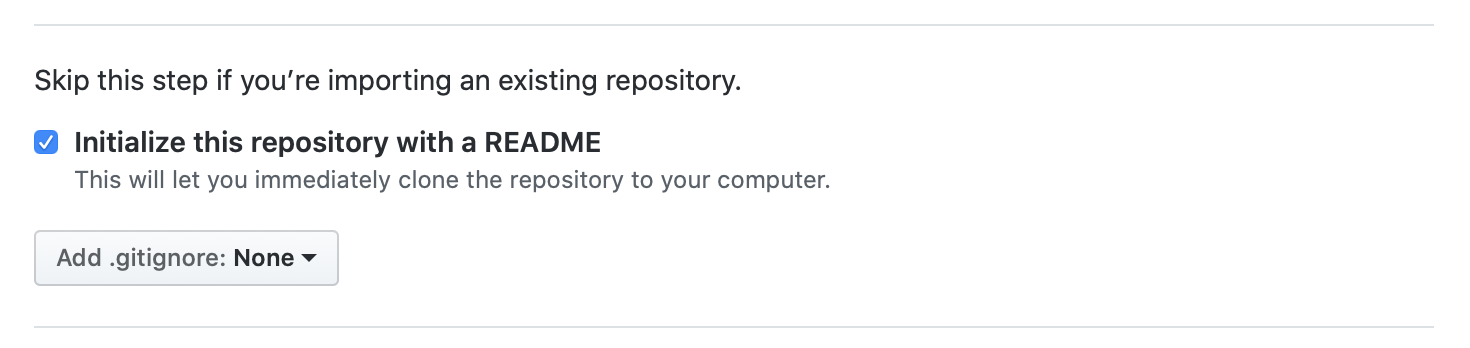
Fig. 11 Initialize with readme and no .gitignore#
A Git repository has now been created and is ready to be cloned as shown in Fig. 12. You can choose to clone either using SSH og HTTPS. If you know how to setup SSH keys, cloning the repository using SSH is generally favorable as you do not have to write your username and password everytime you clone or push. However, if you do not know how to use SSH keys, it is recommended to clone using HTTPS, but you will need to write your username and password everytime you clone or push.
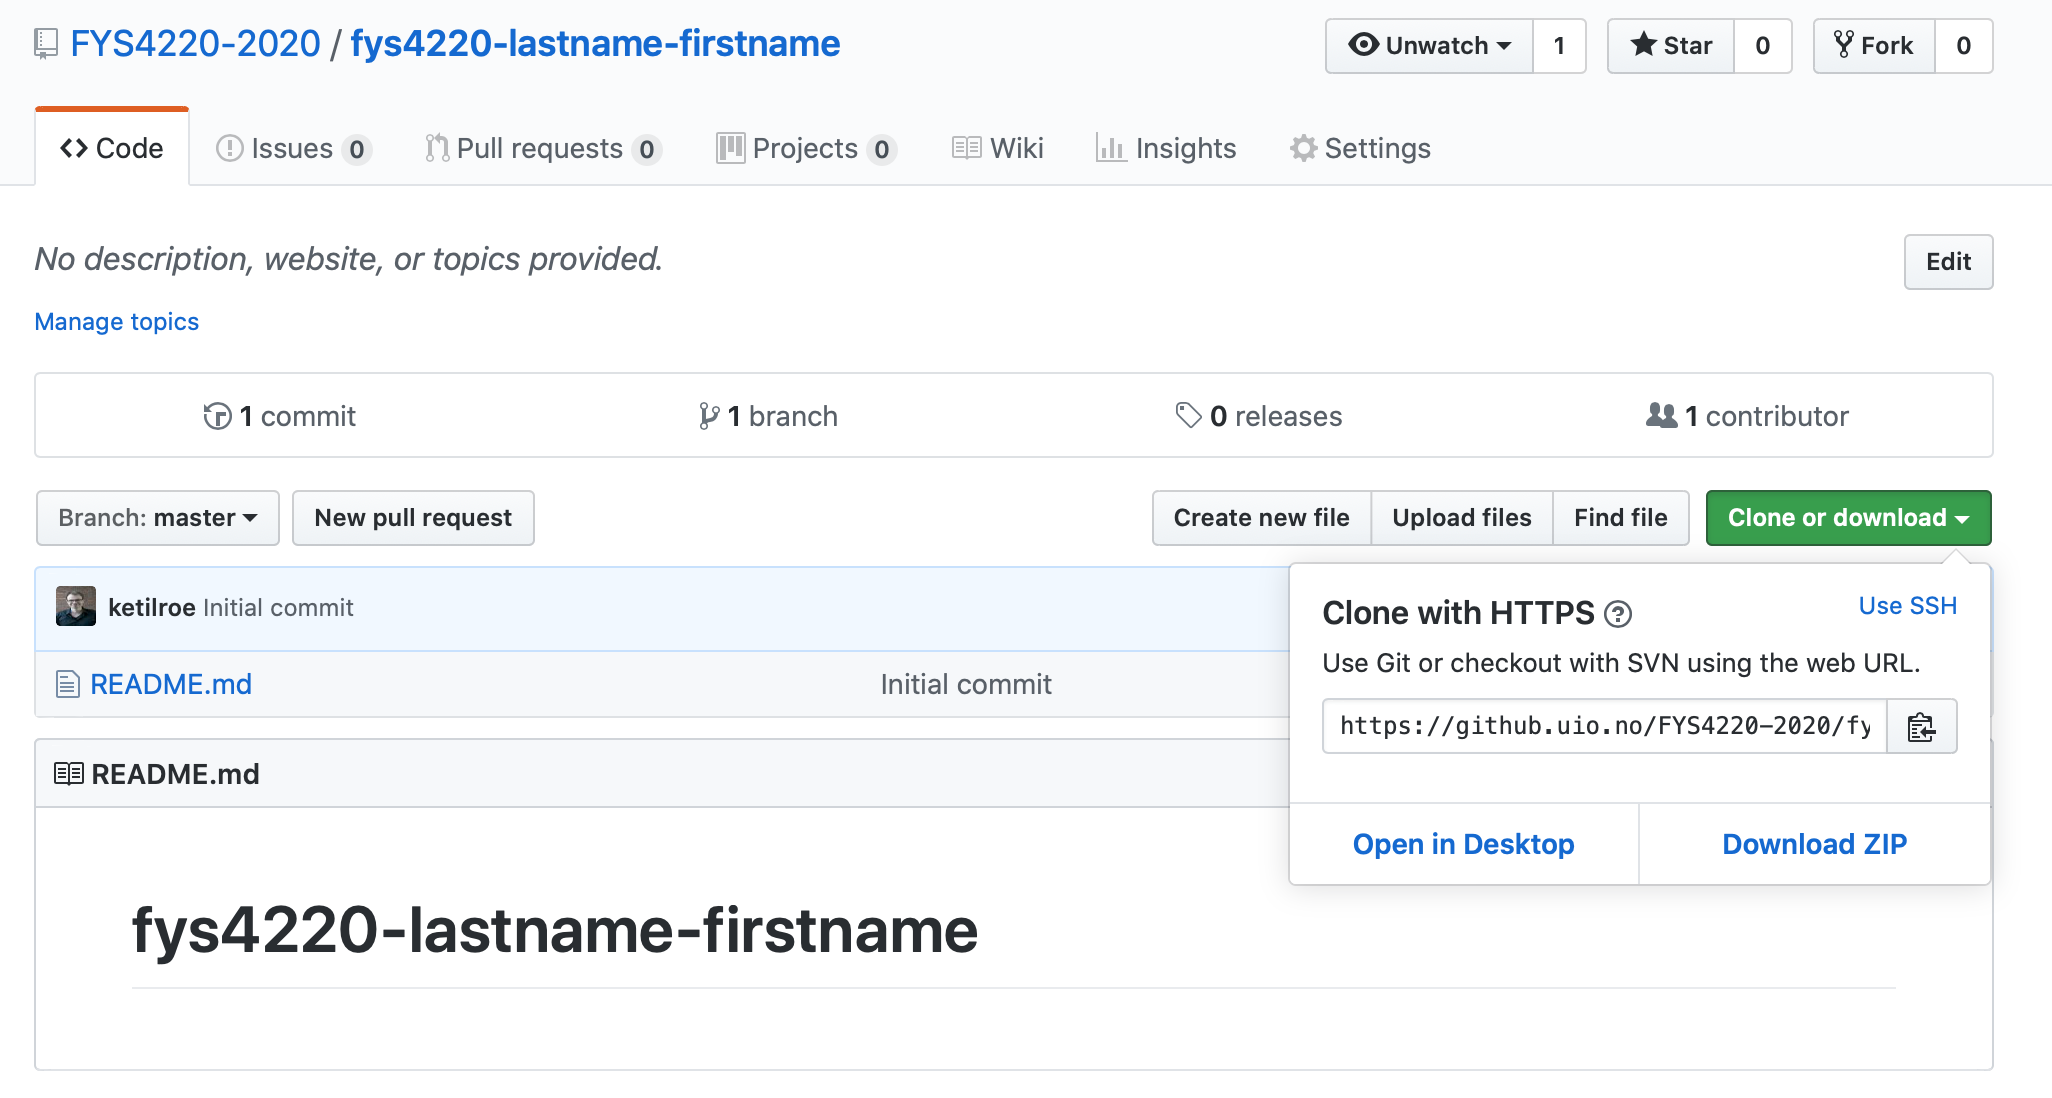
Fig. 12 First view of newly create Git repository.#
Open a Git Bash terminal window. (Windows start menu –> Git Bash) and navigate to the directory where you would like to clone the repository. (On Linux or Mac open a standard terminal window).
Copy the path to the repository and use the git clone command to download the repository’s content.
git clone https://github.uio.no/FYS4220-2024/fys4220-lastname-firstname.git
Navigate into the directory that was just created and open the readme file with your favourite text editor.
Write the following headline:
FYS4220 Git repository for <firstname> <lastname>
You are encouraged to use the readme file to document your work and to keep track of your progress. The content of this file, as well as the code uploaded to your Git repository, will be the basis for the final evaluation and approval of the project.
A .gitignore file is used by Git to filter out files that are not subject to version control.
To add this file write the following command inside the directory of the Git repository. Do not forget the leading punctuation mark.
touch .gitignore
A file with a leading punctuation mark is a hidden file and is normally not visible in a directory browser. In a terminal window you can write ls -a followed by enter to see all files in the directory. To view the file in the Windows File Explorer, enable Show hidden files, folders and drivers from the View tab of (File –> Change folder and search options).
Open the .gitignore file and add the following lines and save the file.
# ignore Quartus  generated folders
db/
incremental_db/
simulation/
timing/
*_sim/
output_files/

# ignore special files except .gitignore
.#*
\#*
*~
_*
.*
!.gitignore

# ignore Quartus generated files
*.rpt
When you have completed this part, make sure to update the git repository by writing the following Git commands. Remember that at any point in the process you can write
git statusto see the current status of the Git repository.
git add .gitignore
git commit -am "Added .gitignore and updated readme.md"
git push origin main
Verify that you repository has been updated online.
Tip
If you would like check what a Git command is about to do, you can add the dry-run option:
git <command> --dry-run

The dry-run option will check what the git command is about to do, before actually doing so.
Organisation and naming conventions
When working on the individual exercises, it is recommended to follow the suggested structure and naming of directories, files, signals, variable, constants, etc.. You are free to choose your own structure and names, but keep in mind that this will create a mismatch between your stucture and names, and that of the description. For some exercises you may make use of pre-made code, and you will therefore have to check if changes to this code is needed to match your setup.
You are now ready to start working on the first exercise. Remember to update the assignment progress status in the readme file as you move forward, and whenever you start or complete an assignment problem.
Using Git for FYS4220#
If this is the first time you use Git on a computer you should “Tell Git who you are”:
$ git config --global user.name "Sam Smith"
$ git config --global user.email sam@example
Please use you UiO e-mail address.
A normal command line based working flow is shown in figure Fig. 13.
Fig. 13 The most basic workflow when using Git.#
Login to Github.uio.no and clone your repository fys4220-lastname-firstname:
git clone https://github.uio.no/fys4220-2021/fys4220-lastname-firstname.git
This will create a local copy of your git repository.
https://docs.github.com/en/get-started/quickstart/github-flow
Recommended workflow
It is generally good practice to not work directly on the main branch. In this course we will follow the Github flow approach where the main branch always will contain a reviewed and working version of your code, and where dedicated branches are created when developing new features. A new branch is a safe place to make changes. During the development you commit and push changes to the new branch. When you have completed the feature or modification to your code, it can be merged into the main branch. In this course we will use a feature called pull request to review and merge the changes. We will demonstrate this feature below where you will make a change to the README file.
You can read more about the Github flow here.
Create and checkout a new branch called development.
git branch development
git checkout development
# Check that you are on the correct branch
git branch
Edit the README file add some text. Then add the file to the staging area.
git add README.md
Commit the change with a relevant/informative message.
git commit -m "Made changes to file README.md"
Push these changes to the development branch on the remote repository on Github.uio.no.
git push origin development
It is possible to combine the git add and git commit command in one step by adding -a to git commit.
git commit -am "Made changes to file README.md"
Type git commit -h and find out what the -a argument means.
If there are changes on the remote repository which are not yet updated locally, you will first have to download these changes using git pull before you can upload your local changes.
Tip
To reduce the risk of merge conflicts, only make changes to your local repository on your PC. Do not edit the files directly in the browser. See the CS50W lecture on Git above for an example of how to handle merge conflicts.
After the local changes have been pushed to the development branch on Github.uio.no, you can create a pull request
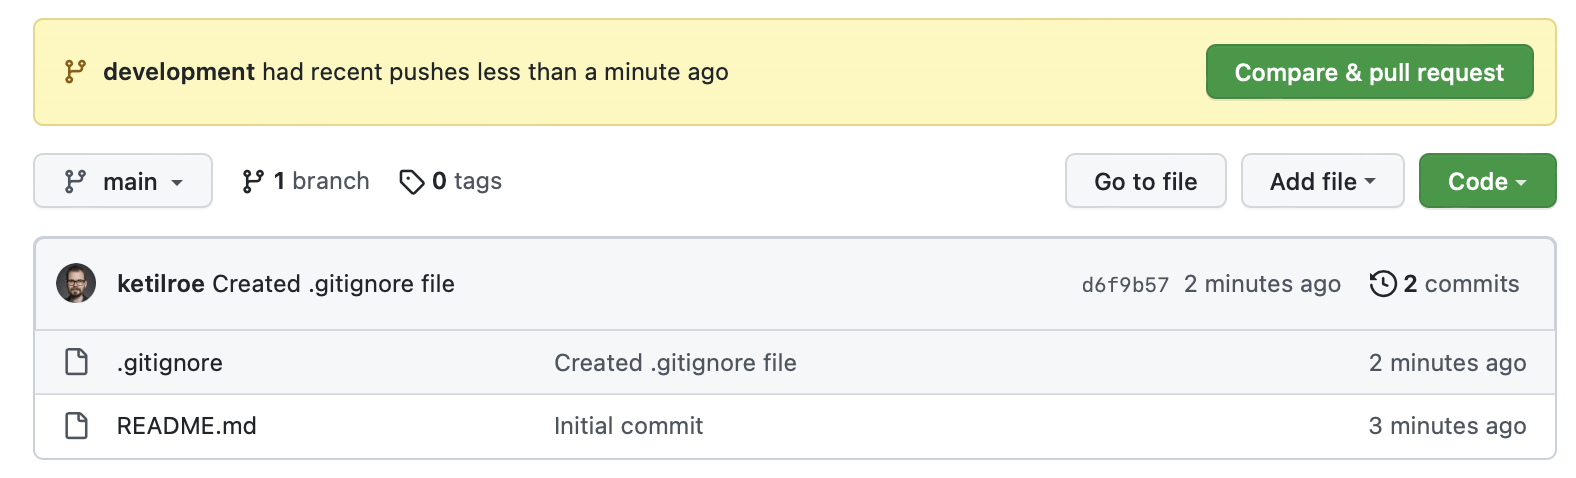
Fig. 14 Press the Compare & pull request to create the pull request.#
This will open a new page where you should write a message to explain the changes you would like to have reviewed and merged to the main branch. Press the Create pull request button.

Fig. 15 Write a message to explain the changes that should be reviewed for a merge to the main branch.#
If you are happy with your code and don’t want anyone else to review it go ahead and merge the pull request your self. However, if you would like the code to be reviewed by the course instructor or anyone else, add their respective usernames under Reviewers and Assignees. The username of the course instructore is ketilroe.
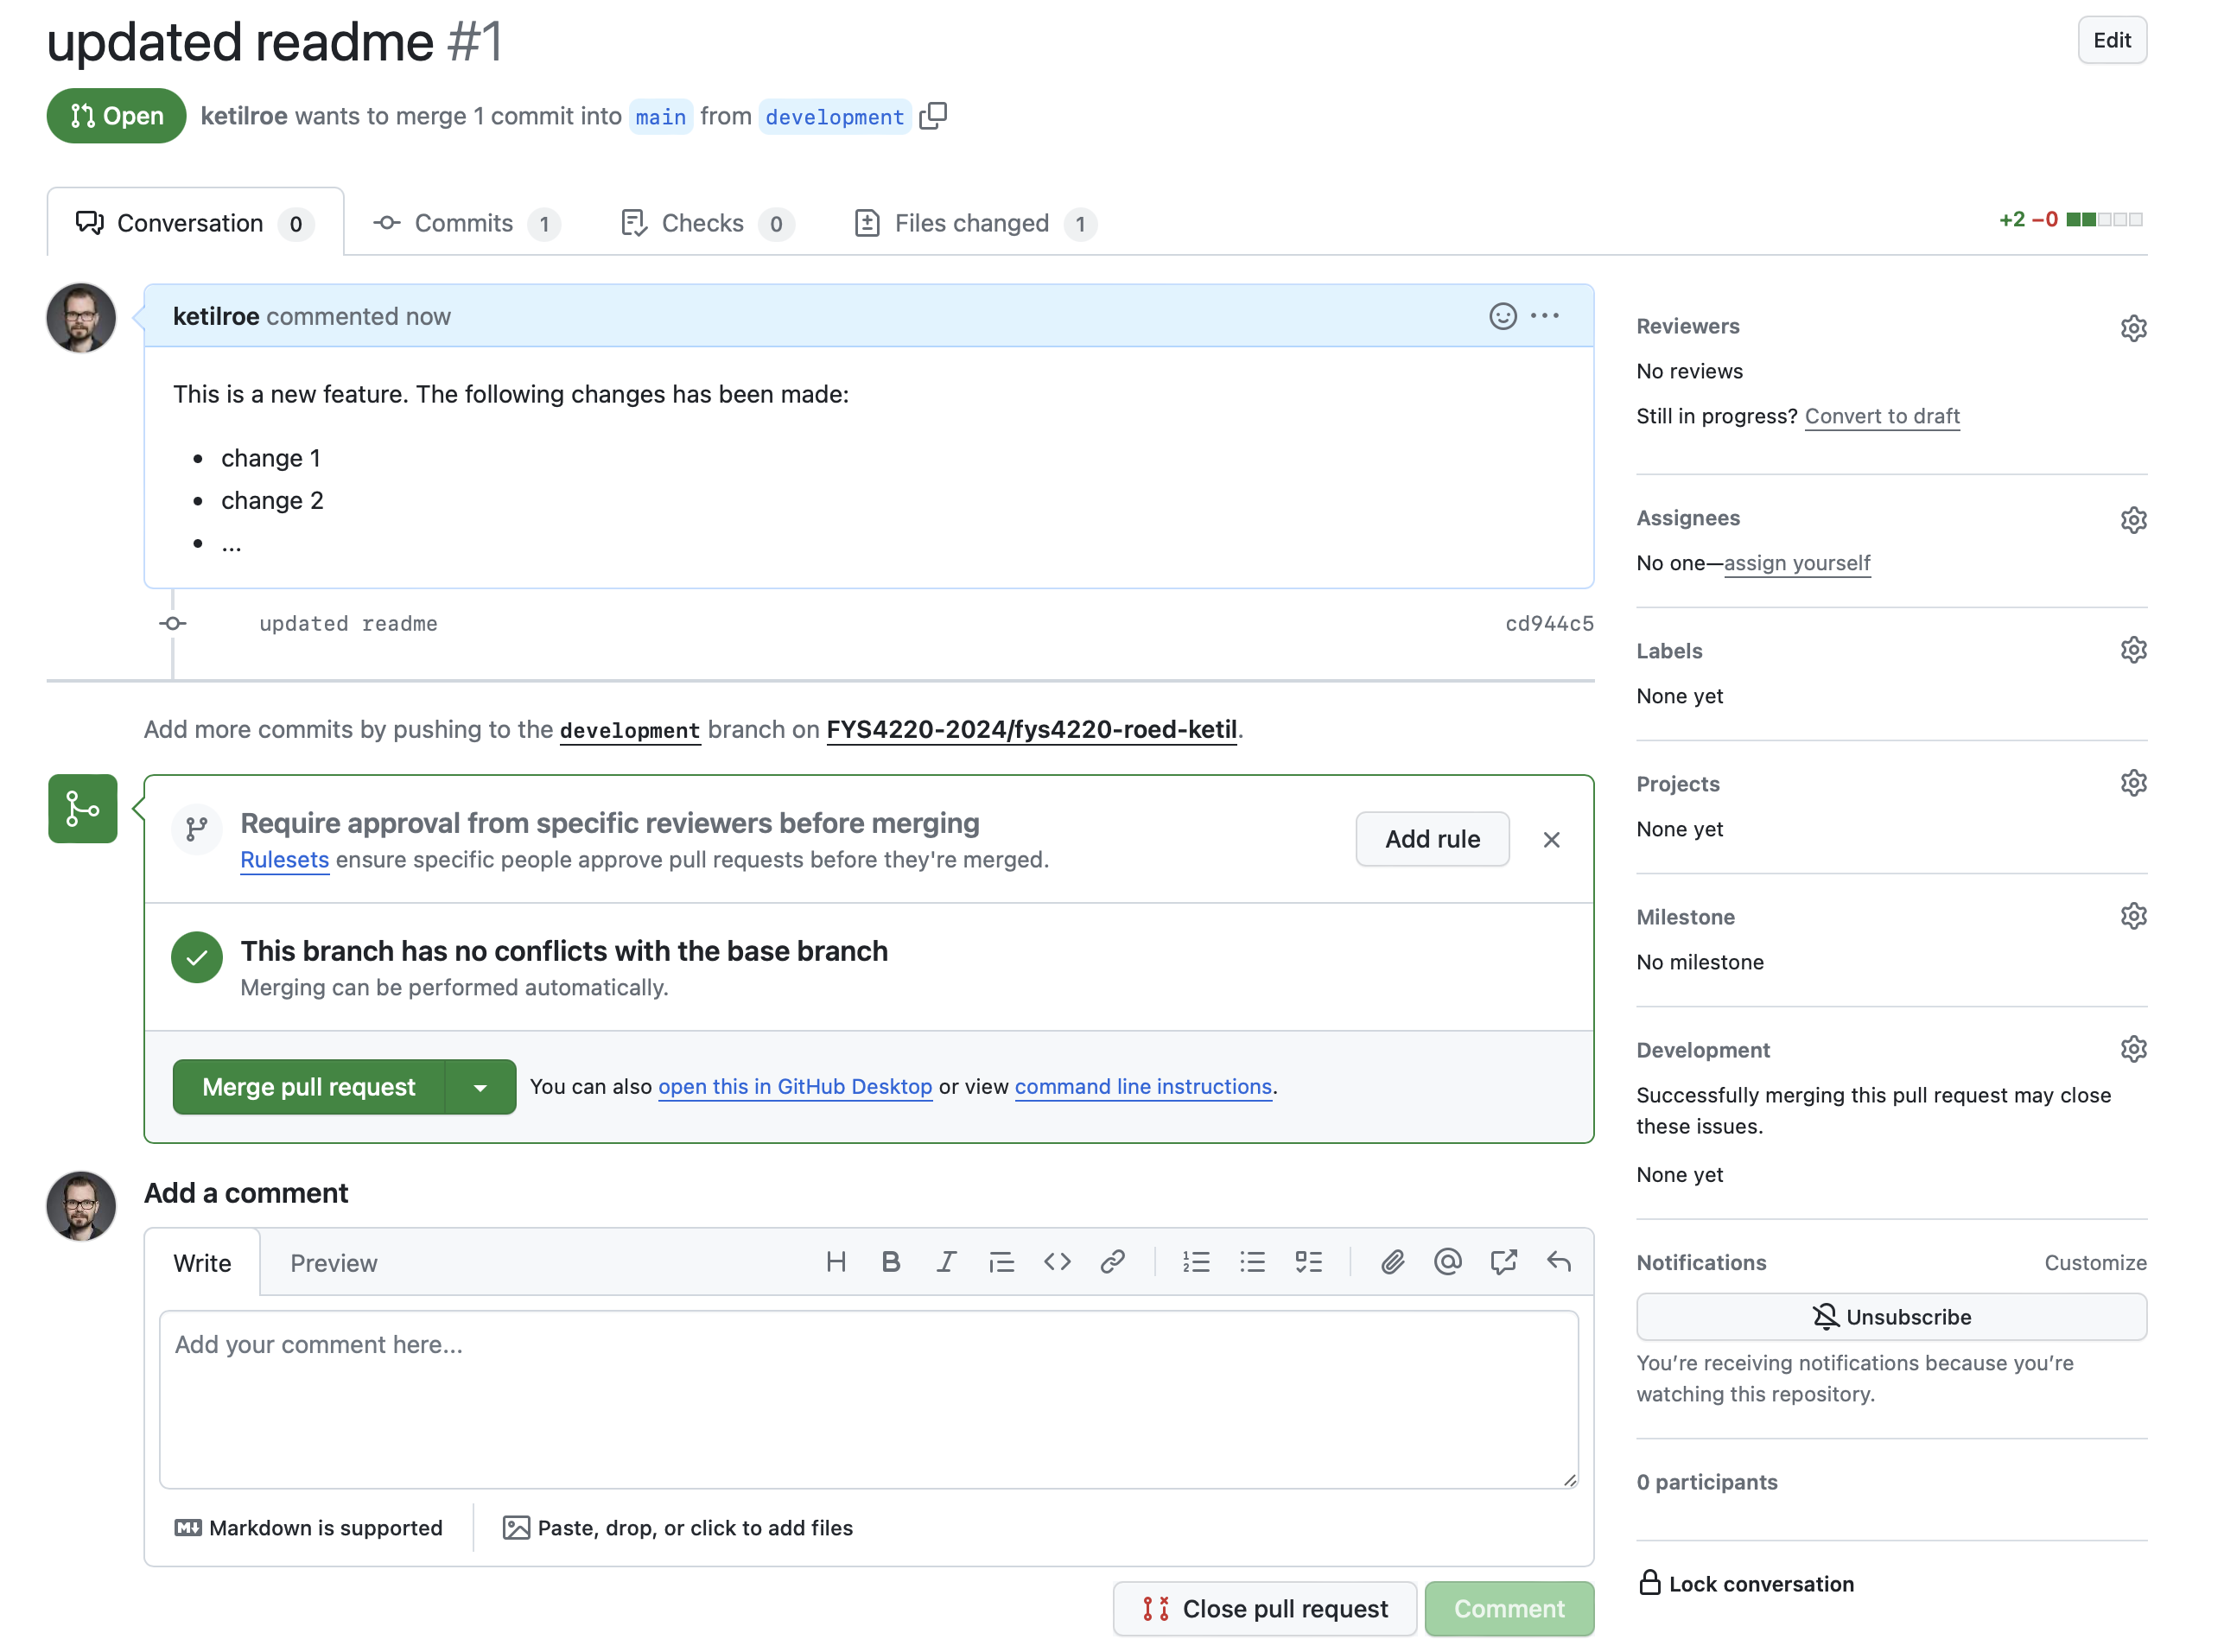
Fig. 16 The pull request have been created and the merge to the main branch is awaiting a review.#
We will use the same procedure when you are working on the exercises and project.